
Publish to CoffeeCup S-Drive
S-Drive is CoffeeCup’s own managed hosting platform, built to connect directly to Site Designer: design, click publish, and your site is live.
What’s included
- Free SSL on every site
- CDN delivery
- 99.9% uptime SLA
- Starting at 5 GB of storage
Published sites get a subdomain in the form https://your-site.coffeecup.com.
Publishing
The app uploads all your files to your CoffeeCup account automatically — no separate upload step. All you need is your CoffeeCup email address and password.
- Click the Settings toolbar button and choose Publish.
- Enter your CoffeeCup email and password, then click Sign me in!
- From the list of your available addresses, click the one you want to publish to, then click OK.
- Click Publish in the toolbar. When the upload finishes, a link to your site appears on screen.
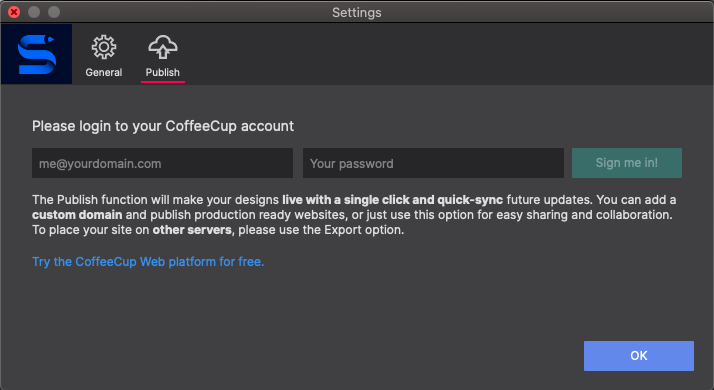
From then on, publishing is one click.
Using your own domain
Your S-Drive site doesn’t have to live on its CoffeeCup address. You can point a domain name you own at it, whether you buy the domain through S-Drive or already have one with another registrar.
Buy a domain through S-Drive
- While signed in to S-Drive, open the domain purchase page, enter the domain name you want, click Add Domain, and follow the steps to buy it.
- Wait for the confirmation email. Once it arrives, visitors to that domain see everything you publish through your S-Drive account.
- Open the Master Your Domains page. It lists your purchased domains, each with a drop-down of your CoffeeCup URLs. Choose the URL the domain should point to.
- Tick Use www if the site should also answer on
www.yourdomain.com. - Click Save Settings.
Use a domain from another registrar
A domain bought elsewhere can point to S-Drive too. It takes two parts: a DNS change at your registrar, then an alias in S-Drive.
At your registrar
- Log in to your registrar account and open the DNS management page. Some registrars call it Edit DNS or Host Records. You may need to select the domain first.
- Find the input for the
@symbol. This sets the domain’s A record. - Enter
66.223.62.9as the A record value, and save.
In S-Drive
- Go to your S-Drive Dashboard, click the Settings tab, then click Manage Domains.
- On the Domain page, select Your Domain Aliases.
- Enter your domain name in the first field, choose the CoffeeCup address it should point to from the drop-down, and click Add Alias.
- Click Hosting → Settings in the top navigation menu, and use the drop-down to set your alias as the Primary Domain.
Subdomains such as www
The A record only covers the bare domain: mydomain.com works, but www.mydomain.com doesn’t, because www is a subdomain. Add each subdomain as a CNAME record, on the same registrar page as the A record:
- Host name — the subdomain, such as
wwworblog. - CNAME value — your domain, such as
mydomain.com.
Repeat this for as many subdomains as you like.
Check the domain
To test a CNAME setup, go to your S-Drive Dashboard, click the Settings tab, enter your domain name in the box next to http://, and click Check Domain.
- “Success! Looks like your domain is set up correctly.” Click Save Settings at the bottom of the page, and your domain now opens your S-Drive site.
- “Oh no! Looks like your domain is not set up correctly.” Ask your registrar to confirm the record was entered properly, and remember that changes can take 24–72 hours.